If you want to increase the coverage of your existing wireless network, it is recommended that you perform D Link WiFi extender setup in your home. D-Link produces a range of wireless extender models like D-Link dap 1520, dap 1330, dap 1320, and much more. All these models are smart as well as user-friendly in their own way. You can easily tweak the settings of these extenders.
In this guide, we have talked about the process of D Link extender setup, D-Link extender login, and other related topics. Not that just, but we have also discussed the solutions to resolve various D Link extender setup and D-Link extender login issues. So, wait no more, and read on.
Basic Prerequisites for Dlink Setup

Before you start with the D Link WiFi extender setup process, keep the following prerequisites in mind. They will prevent you from facing D-Link WiFi extender setup issues in the future.
- Your computer or laptop should be fully charged
- Note down the default web address, IP address, as well as the D-Link extender login credentials
- The connection between the router and modem should be finger-tight
D Link WiFi Extender Setup via Manual Method
Although the process of setting up a Dlink WiFi extender is not rocket science, however, many users face issues while doing so. But, worry not because we won’t let you experience D-Link WiFi extender setup issues.
Walk through the guidelines mentioned below and learn how to set up a Dlink WiFi extender in a hassle-free manner using the Manual method:
- Place your Dlink WiFi extender in the same room as that of the existing router.
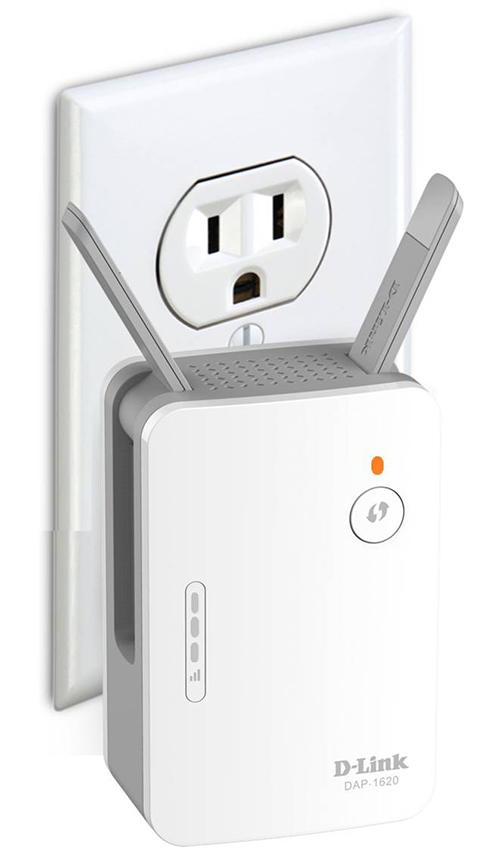
- Plug your D-Link extender into an electrical outlet.
- Press the Power button and let the LED become green.
- Grab a cable and create a connection between your Dlink WiFi extender and the existing router.
- Note: The connection between your D-Link extender and router should not be loose.
- Once done, switch on your PC.
- Launch an internet browser.
- Note: Make sure that whatever internet browser you use, it is running on its updated version.
- In the URL bar of the browser, type the default IP address. You can also make use of the default web address to log in to your Dlink WiFi extender.

- Press the Enter key.
- When you reach the D-Link extender login page, enter the default D-Link extender login username and password.
- Click Log In.
- Once you are on the D Link extender setup wizard, click the Setup tab.
- Now, follow the on-screen instructions to complete performing Dlink setup.
In this manner, you will be able to perform D Link WiFi extender setup manually.
Note: In case you get stuck at any point while trying to perform Dlink setup, feel free to get in touch with our technical experts for help.
Another method through which you can configure a Dlink WiFi extender is via the WPS method. For that, you need to continue reading.
D Link WiFi Extender Setup Using WPS Method
The WPS method is the easiest method to set up a Dlink WiFi extender. If you found the aforementioned D Link extender setup method difficult to perform, you can give the below-outlined D-Link WiFi extender setup process a try.

So, follow the guidelines mentioned below and learn how to perform Dlink setup using the WPS method:
- Plug the Dlink WiFi extender into a wall outlet and turn it on.
Note: Ensure that your Dlink WiFi extender is getting an uninterrupted power supply from the electrical outlet. - Create a connection between your D-Link extender and your home router.
- You can either use a wired or wireless source to connect your devices.
- Look for the WPS button located on your Dlink WiFi extender.
- Once found, carefully press it.
- Next, change the location of your device to complete the D-Link WiFi extender setup process.
In this way, you will easily be able to perform D Link WiFi extender setup using the WPS method. Now, you are free to connect as many devices as you want with the extender’s network to access a blazing-fast internet connection.
D Link WiFi Extender Setup Using D-Link App
If you want to perform D Link WiFi extender setup using your mobile device, then consider opting for the D-Link app.
Walk through the below-mentioned steps and learn how to perform D Link extender setup using the D-Link app:
- Place your D-Link extender in the centermost location of your house.
- Then, connect the extender to your home router properly.
- Unlock your mobile device and go to the Google Play Store or the App Store.
- Search for the D-Link app and then download it.
- Next, open the application and select your Dlink WiFi extender from the list.
- Tap New Setup.
- You also have the option of scanning a QR code located at the bottom of your Dlink wireless extender.
- The D-Link app will instruct you with the further Dlink setup process.

Bravo! By following these instructions, you will be able to perform Dlink setup. If you face any issues while performing D-Link WiFi extender setup using D-Link extender login credentials, you can reach out to our experts at any hour of the day.
D-Link Extender Login Instructions
Take the help of the below-mentioned instructions and get to know how to log in to your Dlink WiFi extender:

- First of all, make sure that your Dlink WiFi extender is receiving an adequate power supply from the wall outlet.
- Once assured, turn on your computer.
- Open any web browser of your choice.
- Type https://dlinkap.local in the address bar of the web browser.
- Press Enter.
- When prompted, enter the default D-Link extender login credentials of your wireless device.
Note: If you are not sure regarding the D-Link extender login username and password of your Dlink WiFi extender, it is recommended that you refer to the label at the bottom of your device. You will find every little detail regarding your extender there. - Click Log In.
And that’s it! With that, you will successfully be able to log in to your Dlink WiFi extender.
Troubleshooting D Link WiFi Extender Setup Issues
While performing Dlink setup, many users come across technical issues. If you are amongst those users, you should consider taking the help of the below-mentioned tips to troubleshoot those issues:
- Make sure that the wall socket through which your Dlink WiFi extender is getting power is in good condition. If it isn’t, consider plugging your device into another electrical outlet.
- If you choose to use an Ethernet cable to connect your Dlink WiFi extender and the existing router, make sure that it is not worn out or damaged from anywhere. In case it is, get the cable replaced with a new one immediately.
- Ensure that your D-Link extender as well as router are placed away from things like mirrors, fish tanks, cordless phones, washing machines, baby monitors, Bluetooth speakers, refrigerators, microwave ovens, treadmills, aluminum studs, televisions, etc. Also, avoid placing your devices in corners or near thick concrete walls.
- Whether you are using Google Chrome, Mozilla Firefox, Apple Safari, or any other web browser, make sure that its cache, cookies, and browsing history are cleared.
- Do not enter the default IP or web address of your Dlink WiFi extender in the search bar of the web browser. Instead, type it in the address bar of your browser.
- Avoid making typos while entering the default web address and D-Link extender login credentials.
We hope that these troubleshooting tips will help you resolve whatever issues you were facing during the D Link WiFi extender setup process.
How to Perform D Link Firmware Update?
For the smooth functioning of your Dlink WiFi extender, you need to update its firmware from time to time. Performing D Link firmware update will not just fix bugs and errors but also enhance the overall performance of your wireless device.
Follow the below-outlined steps and learn how to perform D Link firmware update by accessing the D-Link extender login page:
- Get your computer ready and open an internet browser on it.
- In the address bar of the browser, type https://dlinkap.local.
- Press Enter on your keyboard.
- The D-Link extender login page will appear on your computer screen.
- When asked, fill in the D-Link extender login details.
- Click Log In.
- Go to Settings.
- Click Management.
- Next, select the Upgrade option from the dropdown menu.
- Select the ‘Check for New Firmware’ option.
- Your Dlink WiFi extender will search if there is a new firmware version available.
- If there is, select Update Firmware.
- Doing so will initiate the D Link Firmware Update process.

By following these guidelines, you will easily be able to perform D Link firmware update. On the off chance, you come across any issues while trying to update the firmware of your device; it might be because of the reasons listed below.
Why Did D Link Firmware Update Fail?

- The connection between your Dlink WiFi extender and the existing router is not stable.
- The WiFi signals of your D Link extender are getting interrupted or overlapped.
- There is some hardware damage.
- You haven’t properly followed the instructions to perform D Link firmware update.
- You’ve used the wrong D-Link extender login details to log in to your device.
- Technical glitches can also stop you from performing D Link firmware update via https://dlinkap.local.
Now that you are well aware of the reasons that might have led you to the D Link firmware update failure issue, follow the tips mentioned below to resolve it.
Fixed: D Link Firmware Update Failed
a) Reboot Your Dlink WiFi Extender
Before you do anything else, reboot your Dlink WiFi extender. Doing so will help you get rid of the technical glitches. In order to reboot your wireless device, here are the instructions that you need to follow:
- Disconnect every client device connected to the network of your D-Link extender.
- Power off your Dlink extender and unplug it from the electrical outlet.
- Wait for some time.
- Next, plug your Dlink extender back into the wall outlet and do not forget to turn it on.
Now, check if you are able to perform D Link firmware update by accessing the D-Link extender login page? If not, continue reading.
b) Follow the Correct Instructions
As mentioned above, there is a possibility that you haven’t followed the correct instructions to perform D Link firmware update.
To troubleshoot the issue, it is recommended that you keep your eyes open while following the steps the next time you try to update your device. If you need any help to perform the firmware update process, don’t hesitate to get in touch with our well-versed technicians. They are always available to assist you.
c) Keep WiFi Interference at Bay
Transmitting appliances, metal objects, electronic devices, and reflexive surfaces can interfere with the signals of your Dlink WiFi extender and degrade its performance.
Therefore, it is recommended that you change the location of your wireless extender and ensure that you place it away from such things. Otherwise, not being able to update the firmware of your device is just the beginning.
d) Verify the Ethernet Connection
Have you checked the Ethernet connection between your Dlink WiFi extender and the existing router? If not, do it now! If the Ethernet cable connecting your devices is not in a good condition, get it replaced with a new one.
If doing doesn’t work in your favor, it is recommended that you connect your devices using a wireless source.
Once a strong connection between your devices has been established, try to access https://dlinkap.local and update the firmware of your extender. Are you still not able to?
e) Contact the Internet Service Provider
If none of the aforementioned tips have worked for you in troubleshooting the D Link firmware update issue, then, sadly, you are left with no other option than to contact your Internet Service Provider.
Chances are that there is an internet issue from the end of your ISP due to which you are unable to update your extender. Confirm the same first. If what we are assuming is true, ask your Internet Service Provider to get the issue fixed as soon as possible.
How to Change D-Link Extender Login Password?
In order to make the network of your Dlink WiFi extender secure, it is recommended that you change its default password. Wondering how to do that? Well, wonder no more! Simply, take the help of the steps mentioned below and learn how to change D-Link extender login password:
- To get started, open up a web browser on your PC.
- Type https://dlinkap.local in the address of the web browser.
- Press Enter.
- Once you are on the D-Link extender login screen, enter the default admin username and password.
- Click Log In.
- From the dropdown menu, click Settings > Wireless Settings.
- The Wireless Settings page will come into view.
- Under the Password field, input a new D-Link extender login password.
- Hit Save.
- Wait for some time and let the changes that you have made to your device become effective.

And with that, you’ll successfully be able to change the D-Link extender login password.
How to Reset Dlink WiFi Extender?
You can restore your Dlink WiFi extender using two different methods:
- By using the Reset button
- By accessing the D-Link extender login page
Follow the guidelines mentioned below and learn how to reset your D-Link extender.
D-Link Extender Reset Using Reset Button
Here is how you can restore your Dlink extender using the Reset button:
- Look for the Reset button located on your wireless extender.
- Once found, carefully press it using an oil pin or any other sharp object.
Now, give your device some time to get restored to the factory default settings.
D-Link Extender Reset via https://dlinkap.local
Walk through the guidelines given below and get to know how to restore your D-Link extender by accessing the D-Link extender login page:

- Open an internet browser on your PC.
- In the URL bar of the internet browser, type https://dlinkap.local.
- Hit Enter.
- When asked, fill in the D-Link extender login username and password.
- Click Log In.
- On the dashboard, go to Settings.
- Click Reset.
- When asked for confirmation, click the ‘Yes’ button.
Note: Follow the aforementioned instructions in the exact order as they are written. Otherwise, you might come across technical issues.
By following these instructions, you will be able to restore your device to the factory default settings in a hassle-free manner via D-Link extender login and Reset button. In case you get stuck at any point during the process, know that our experts are not that far to reach.